Discord Single Sign-on in .NET Application
Published on: Jan 19th, 2025
Learning how to use Discord Single Sign-on within a .NET application.
Everything used in this project:
- Visual Studio 2022
- .NET 8.0
- Discord Developer Account
When I first started out as a developer one of the more interesting ideas/concepts was single sign-on and how it functioned. My first initial thoughts were mostly the same as most, “Oh it just uses your username and password authenticates it and boom... magic” ... Where this may seem correct it is far more complex than just that.
Single sign-on is a method where you allow users access an application or service with a set of credentials this improves security as well as makes the user experience more convenient as it allows them to sign in once to utilize all the applications or services for that organization. In this post I will show how discord single sign-on works and a basic understanding of using it within a .NET application as this is what I created for one of my projects, even though this is specifically discord single sign-on almost any single sign-on should operate the same.
The first step before beginning a project of this caliber, or at least the approach I took, was research—seeing if anyone has done a similar project or if there are any resources you can utilize to help you through this process. For my specific project, I couldn’t find any real resources besides the specific documentation via Discord's Developer Documentation and my own knowledge of how a sign-in system works.
The second step I did after understanding the documentation was setup my .NET project using .NET 8.0 as my target framework I kept it simple to avoid having lots of variables until I understood the functionality, A simple one page screen that has a navbar that allows a user to login with discord, as well as a controller that will allow the information to be displayed which we will call “HomeController”, and once logged in the webpage will redirect and the navbar will update to display text “You’re logged in as username” as well as the home page showing the users discord picture and username.
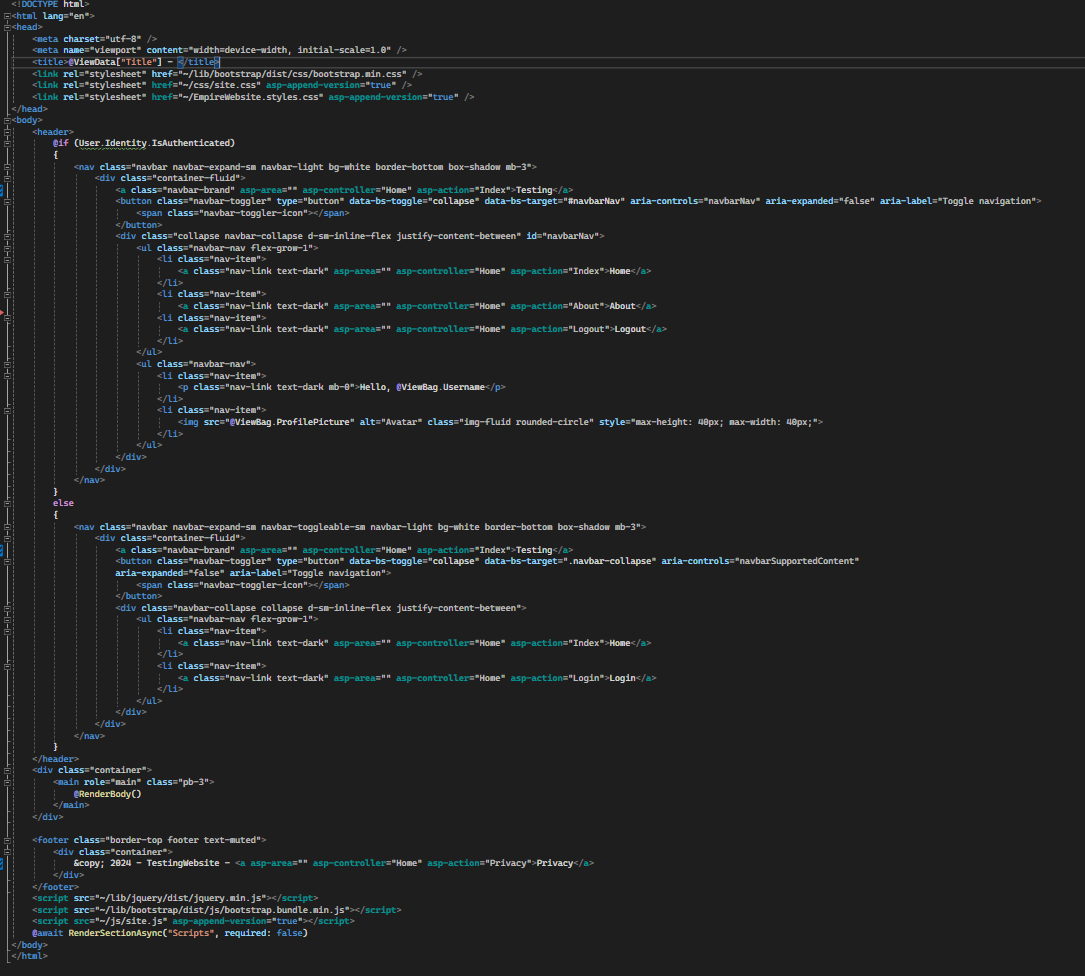
This is the Navbar in the .NET _Layout.cshtml file that is located under the
"Shared" folder will be changed based on if the user is
authenticated or not.
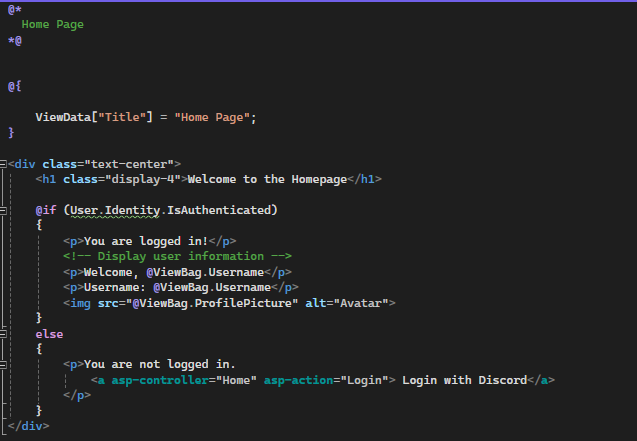
This is the Homepage layout that I used for this example, it is very simple and just displays the
users discord username and profile picture once authenticated and if not authenticated it will
display a login link to click on.
The homepage screen I created was super simple and basic a simple navbar with the home and login
links to click on either on the navbar or on the page itself and a welcome message and once the
person gets authenticated they will have access to more
items in the navbar.

Once you login you will see the discord information that gets pulled, the username and profile
picture, just know this is a very simple example on how you can use discord for single sign on
features within a .NET application.

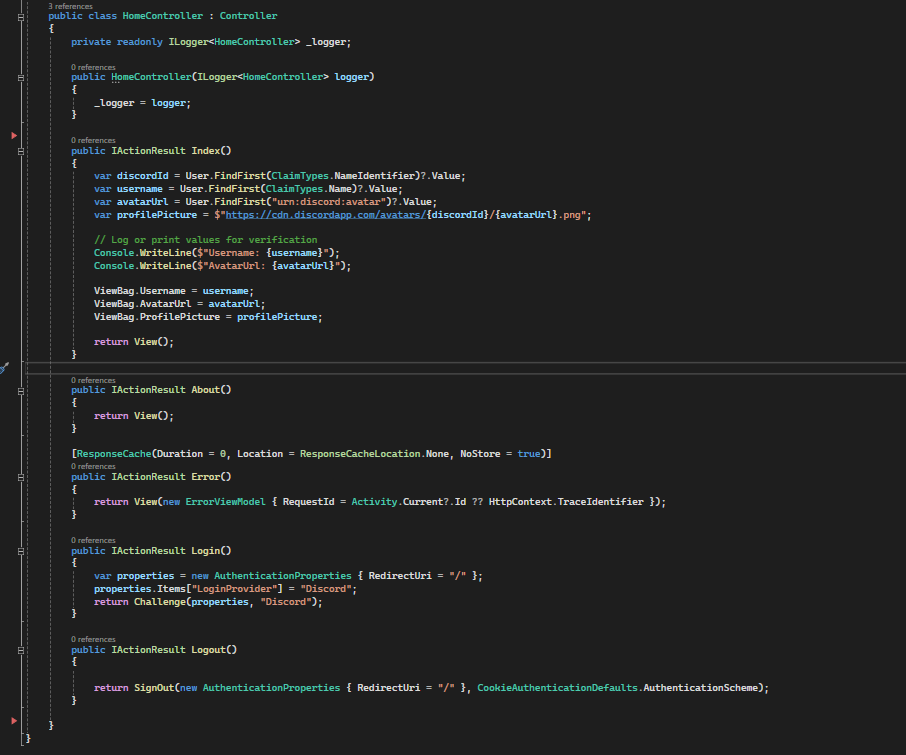
This is our "HomeController" that handles the logic for the homepage respectively as you can see if
the user gets authenticated their username and profile picture will be displayed on the welcome
screen.
The third step was to go to discord’s bot creation page and create a bot for the use of our single sign-on as you need to have this in order for this to allow users to sign into your application and set the appropriate settings required for this to work mainly you need to edit the OAuth2 settings as well as keep your discord client ID and secret for the discord bot.
First you will need to go to Discord's Developer Portal and then click on "Applications" in the top left.
After you click that you will be prompted to login via discord once you log-in you will be in the
bot creation part of discord for developers you want to click on "New Application" in the top right
of the screen

Then you will be prompted to create a name for the application pick the name of the bot you want,
You will then be brought to the general information of the application you just created, note down
the Application ID as we will need to use this later when we integrate it within .NET, make your way
to the "OAuth2" tab on the left side of the screen.
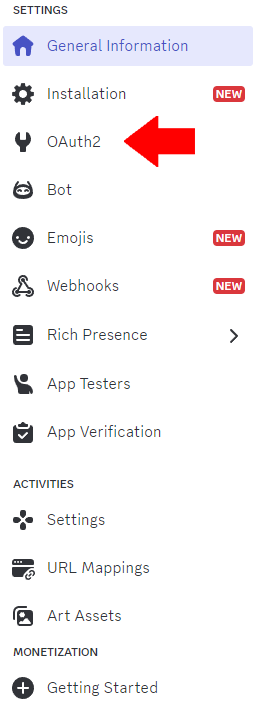
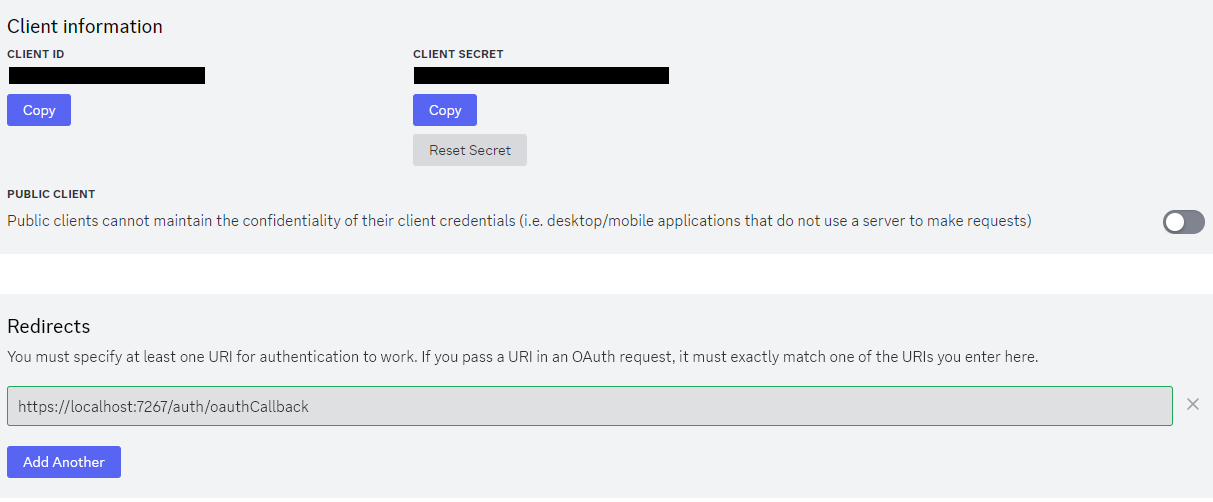
Once you click on this tab you will see more information about OAuth2 and all the options you can use for your bot such as only allowing users that are within a certain discord to be authenticated, for this example all you will need is:
- The Client ID
- Client Secrect
- A redirect URI
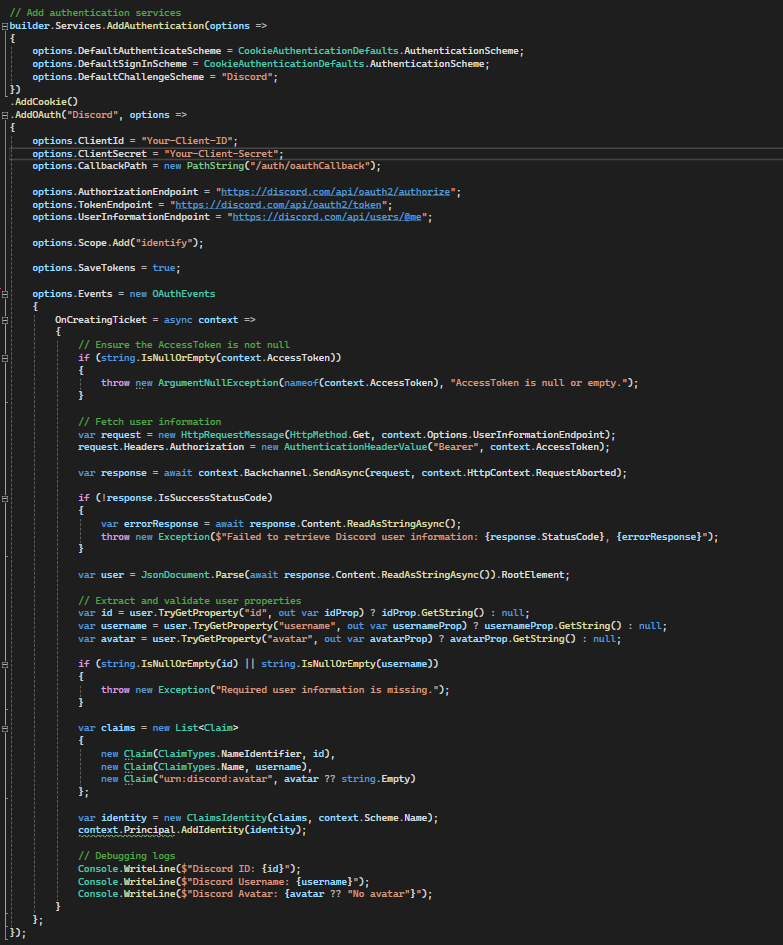
The fourth step was to finally integrate the discord bot you just created within the .NET project itself depending on what version of .NET you are using you will have to add the Authentication builder and oAuth for the discord bot as well as oAuthEvents to get the information and pass it to the “HomeController” for displaying the information that is received, for mine I had to add it within the “Program.cs” to allow the .NET application to use it, however I know in other versions it is slightly different.
Within my "Program.cs" file In this screenshot is the simple setup for the oAuth integration with some added debug print statements to the console but this is a great simple start on how you would integrate it within your project.
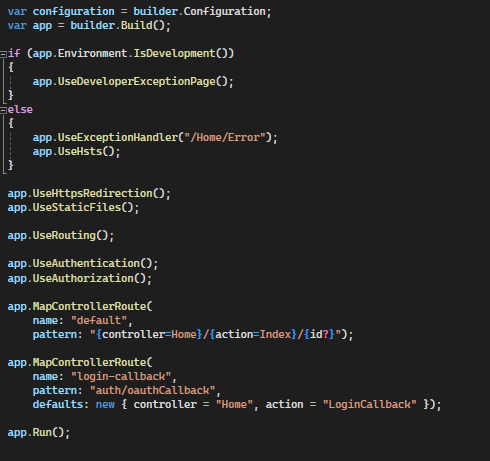
The fifth step once you have setup both your Discord bot and application properly it’s time to test, run your application go to web address it lists normally it’s localhost:5000 by default but if you happened to change the port then go to localhost:portnumber respectively, for my example it would be localhost:7267.
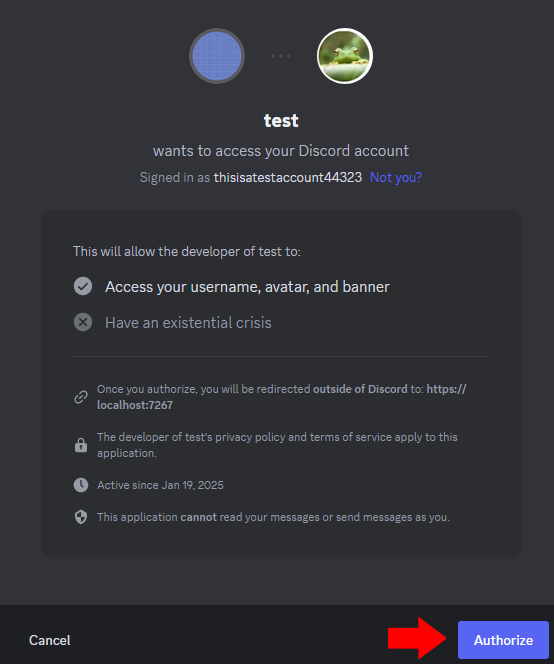
Once you see the page click on “Login with discord” and it should prompt you to authorize the discord bot you created previously.
Conclusion
This is a very basic example of how to use Discord single sign-on within a .NET application, I hope this helps you understand the basics of how to use it and how to implement it within your own projects.